Thursday, February 18, 2016

Baked Asparagus (Cheesy or Not Cheesy)

It's been awhile since I've done a new healthy food post. Between family sickness, pregnancy, morning sickness, and fatigue..plus raising two young boys...I haven't been able to do too much or honestly even cook. When every food turns your stomach, you REALLY don't want to cook. It just doesn't happen. Thankfully, I will be 16 weeks tomorrow, and my nausea is finally settling down, I'm desiring to eat again and LOVING to cook again. I'm even excited to try new foods which shows my energy is coming back! Yippie!!

The funniest part is that I usually can't have dairy. I'm lactose-intolerant. BUT, for some reason during this pregnancy cheese has been one of my top 5 cravings, and I'm actually handling it really well! It's been so fun to eat cheese again!! So, of course I want to cook with cheese a lot while I can still eat it.


One of the grocery stores here had a great sale on asparagus, and since it's usually quite expensive I couldn't pass up the great deal! I bought two bunches and headed home to find a delicious looking recipe...thank you Google. I finally found one with few ingredients, that was quick to make, and easy. Win, win, win. That recipe calls for 2 Tbsp of olive oil and grated parmesan cheese, but I noticed that only 1 Tbsp of olive oil is really needed to make this recipe delicious. Also, I opted for mild cheddar cheese instead of parmesan. My family just prefers it!

I wasn't sure how my family would like the cheese on the asparagus, so I decided to do half with cheese and half without. If you can't eat dairy or you have none in your house, you can just leave the cheese off or use a dairy free shredded cheese. It is so good either way. My two year old actually prefered it without the cheese! The next night I couldn't help myself and made another batch. This time I left the cheese off completely. There were ZERO leftovers. It feels so good to feed vegetables and healthy oils like olive oil to your family.


Baked Asparagus (Cheesy or Not Cheesy)
(Gluten free, can be dairy free, nut free, egg free, Vegetarian)
1 recipe fed my family of 4 (I ate more than a serving, and my picky 4 year old refused to try it...typical haha)
Adapted from Simply Recipes (find original recipe here)

Ingredients
  • 1 pound asparagus
  • 1 Tbs olive oil
  • Ground all natural sea salt (table salt is fine)
  • Pure ground black pepper (any ground black pepper is fine)
  • A couple handfuls of shredded mild cheddar cheese as desired (optional)

Directions
  1. Preheat oven to 400*F.
  2. Break or cut off the hard stringy ends of the asparagus. 
  3. Line a baking sheet with tin foil and spray with spray oil to make sure none of the spears will stick.
  4. Line the spears on the pan in a row, pour 1/2 Tbs olive oil over half of the spears, and pour the other 1/2 Tbs. of olive oil over the other half. If you don't feel the oil was poured evenly, use the back of your spoon to rub the oil up and down all of the spears to spread it evenly.
  5. Sprinkle the sea salt and black pepper over the asparagus equally.
  6. If you want to include cheese, grab some of the shredded cheese with your hand and sprinkle over the asparagus. Do this as many times as you need for the spears to be covered (or just cover half of them like I did and leave the rest for a cheese free option). 
  7. Bake until the cheese is melted for 8-10 minutes. My oven took 10 minutes exactly, and they were PERFECT!
  8. ENJOY and SMILE :)

Sunday, June 21, 2015

Creamy Coconut Chocolate Mousse

It's been a while...actually a long while. I haven't posted anything new in 4 months! I'm sorry guys. My sweet little boys got busier and busier, and in turn I also got busier and busier. Ha! During all the busyness, I didn't have a lot of time to try out new dishes or come up with any new recipes. One night out of the blue, though, I was craving chocolate..creamy chocolate, and with a lactose intolerance I couldn't just whip up some pudding (which is FULL of dairy). I grabbed a few things in my pantry and got to work hoping to come up with something delicious that would hit the sweet spot.

It took me a couple of tries, but within 30 minutes I had created a creamy chocolate mousse that even my picky 3.5 year old loved. It was easy, fast, and yummy! With only 3 ingredients, you just can't pass on trying it out!


I use coconut cream from Trader Joes, but since there aren't Trader Joes in every state (like the state I live in) you can also buy full fat coconut milk and place it in the refrigerator overnight. When you are ready to make this Creamy Coconut Chocolate Mousse, pull out the can, open it, and skim the delicious cream off the top. DO NOT SHAKE THE CAN. The coconut water will be left at the bottom of the can, and you can use that for so many things! Coconut water is similar to Gatorade in the ability to hydrate you. It's also good to add to smoothies. The leftover cream can also be kept in a sealed container in the fridge for at least a week to make more mousse later :).


The other two ingredients are unsweetened cocoa powder, which is full of antioxidants and has many of health benefits, and stevia powder, which is a natural sweetener.


This recipe is for 1 serving (1/3 cup), but I like to share it with my kids or double the recipe to share with my husband. It's too fun to watch my kids smile and ask for more with "mmmm" sounds as they are eating something very good for them. You can't beat that!


Creamy Coconut Chocolate Mousse
(gluten free, dairy free, nut free, egg free, refined sugar free, soy free, Vegan, Vegetarian)
Serves 1 (Share with a friend or double or triple the recipe to make more)

Ingredients
  • 4 Tbs coconut cream (I use Trader Joes brand)
  • 1 Tbs unsweetened cocoa powder
  • 2 packets Stevia powder (or 4 tsp of any sweetener)

Directions
  1. Place can of coconut cream or full fat coconut milk in the refrigerator the night before you want to make this dessert.
  2. The next day, when you are ready to begin, open the can and scoop out 4 Tbs of cream into a food processor. DO NOT SHAKE THE CAN! (Place leftover cream back in the fridge in a sealed container to use again for the next week or so.)
  3. Pour the cocoa powder and Stevia on top of the cream. (Feel free to add more sweetener if you have a strong sweet tooth.)
  4. Process the ingredients until smooth.
  5. Scoop the creamy mousse into a small bowl and enjoy this healthy, smooth dessert.


Nutrition Facts:
Cals-138, Fat-12.5g, Carbs-12g (7g net carbs), Fiber-2g, Sugar-1.5g, Pro-2.5g

Sunday, January 25, 2015

Slices of Sweet Potato Heaven

We are a family that loves sweet potatoes. We like them whole, diced, mashed, as fries, or added into any dish. One of the newest ways we enjoy eating this beta carotene vitamin rich food is baked in slices. The outside is slightly crunchy while the inside is delectably soft. It is a sweet side to any meal. Even the kids will like them!

My sweet baby loves these!

It takes a little bit of prep work but not nearly as much time as it takes to make homemade sweet potato fries. It makes up for it by taking less time to bake them then whole potatoes. I always prefer olive oil and cinnamon on mine, but using salt and pepper is another way to make this delicious.

You begin by washing the sweet potatoes and slicing off the end tips. Then slice them into 1-2 inch circles. Cut them too thick, and they will take a long time to cook. Cut them too thin, and they will burn. Try to make each circle about the same amount of thickness or they will cook unevenly, and you will end up with some undercooked or some burned. Not yummy stuff.

Note how all of the slices are about the same thickness.


Next pour 1-2 Tbs. of olive oil on a baking pan and rub it over the entire surface of the pan with a spoon. Use as much as you need to coat the pan with a thin layer of oil. Place the sweet potatoes on top and sprinkle with seasoning of choice. I use cinnamon, but feel free to use any herb or seasoning you like. There is no need to put oil on top of the slices at this time. When they are flipped after 15 minutes, the top side will also be coated with the delicious rich healthy olive oil.


Place pan in the oven at 350*F. After 15 mins, pull out pan and flip potatoes. Put back in oven for 15 more mins. When that time is up, turn heat up to 400*F and roast these slices of sweet potato heaven for 15-20 more mins. This will make the top nice and caramelized. Keep an eye on them after 10 minutes of roasting to prevent burning (some ovens can heat quicker than others). 

This is after flipping them over after the first 15 mins.

Here we have the finished product. Delicious Healthy Happy Eats!


Slices of Sweet Potato Heaven
(Gluten free, dairy free, nut free, egg free, Vegan, Vegetarian)
Serves 3 adults or 2 adults and 2 small children (Use as many sweet potatoes as you need to feed your hungry mouths.)
Adapted from nutritious plate

Ingredients
  • 3 sweet potatoes
  • 1-2 Tbs olive oil
  • Cinnamon (or any seasoning or herb of choice)

Directions
  1. Preheat oven to 350*F.
  2. Wash sweet potatoes well, cut off the end tips, and slice into 1-2 inches circles.
  3. Pour 1-2 Tbs of olive oil onto a baking pan, and rub it over the entire surface of the pan with a spoon. Use as much as you need to coat the pan with a thin layer of oil.
  4. Place the sweet potato slices on top of the oil and sprinkle with seasoning of choice.
  5. Put pan into the preheated oven for 15 mins. 
  6. Pull the pan out and flip potato slices. Be careful to not burn yourself!
  7. Place pan back into the oven for 15 more mins. 
  8. Turn up the heat to 400*F for 15-20 more minutes to roast the potatoes. 
  9. Keep an eye on them after 10 minutes of roasting to assure they do not burn.
  10. Pull the pan out of oven and flip over the slices with cinnamon side up. This makes a beautiful presentation.
  11. Let cool for a few minutes since they are VERY hot. Eat and Enjoy!

Please let me know how this recipe worked out for you! I love to read comments and/or suggestions. Feel free to comment on here or on Facebook. Thanks for reading!


Monday, January 12, 2015

Cinnamon Carrot Fries

My last post was about 2 months ago. My household has been SICK off and on since Thanksgiving. It has not been fun. I've been lucky to cook at all, and what I cooked was the quickest, easiest food you can imagine (we had enough Ore-ida sweet potato fries and homemade soup to feed an army!). My family loves the Ore-ida sweet potato fries, but I don't want to give them tooooo many of them. They are definitely healthier than the white potato fries, but still not something I want to serve them on a weekly basis. The last time I posted on here was about Healthy Carrot Fries. Since we are on the up and up from our sickness (at least for the time being), I am pressing full force back toward healthier cooking. I was craving those yummy sweet potato fries, but remembered I had a few organic carrots left in my fridge. YAY! So I decided to make carrot fries, but this time with a sweet twist. I apologize. I did not take a picture before I completely devoured them. :-D

I absolutely love sweet potatoes with cinnamon. While preparing my carrot fries, I had an idea that cinnamon on carrot fries might just be fantastic. So i gave it a try, and they are delicious and yet simple and light. I also tried to forgo the oil and just use spray oil. I wasn't sure if it would work, but it worked just as well! If you have a hankering for fries but don't want the old school salt and pepper fries, I encourage you to try these Cinnamon Carrot Fries!

Updated 1/13/15: added some pictures after making these again. 

The easiest way to cut into 4 sections is to place carrot flat side down to cut.


Prior to cooking


I'm just loving all the cinnamon on these! Cinnamon is so good for you and so are carrots!! (Post cooking)


Cinnamon Carrot Fries
(Gluten free, dairy free, nut free, egg free, Vegan, Vegetarian)

Serves 1 (I made these just for myself today and ate the whole 2 carrots! You can very easily double, quadruple, etc. this recipe to suit the number of people in your family.)

Ingredients
  • 2 medium whole carrots
  • Spray oil
  • Cinnamon
Directions
  1. Turn oven on at 400* F.
  2. One at a time, peel, chop off top end of carrot, and cut into 4 inch pieces. Throw other end away.
  3. Cut each 4 inch piece into 4 long horizontal skinny pieces or 2 long skinny pieces depending on the thickness of the carrot.
  4. Place all prepared carrots onto a sprayed baking pan and place them in a single layer. 
  5. Spray carrots with the spray oil until well coated. Sprinkle cinnamon over all of the fries. (Add as much or as little as you like. I LOVE cinnamon so mine were covered ;) I probably used a total of 1 Tbs.)
  6. Cook for 20 mins on top rack, move onto bottom rack (my lazy way of not having to flip them), and check to make sure they are done. If not ready, cook up to 10 more minutes. Mine were done at 30 minutes total, but all ovens are different. 


Nutrition Facts:
(entire batch)
Cals-69, Fat-0.4g, Carbs-18g, Fiber-7.6, Sugar-6g, Pro-1.4g
(sugar occurring naturally from the carrots)


Wednesday, November 5, 2014

Healthy Carrot Fries

Last night I wanted something healthy, delicious, and simple but reminded me of comfort food. I found a recipe on Pinterest for carrot fries and got super excited! I had a whole bag of organic carrots I had bought on sale last week, and I needed to eat them pronto. What better way than as fries?! It's a very simple recipe, but the prep work does take some time. I won't lie. My picky 3 year old was reluctant at first, but in the end the 9 month old, 3 year old, hubby, and cook all ate them happily! Please let me know what you think in the comments below!

Sorry not the best picture ever. I took this with my phone before
they were devoured!


Healthy Carrot Fries
(Gluten free, dairy free, nut free, egg free, Vegan, Vegetarian)
Serves 3-4

Ingredients

  • 10 large - 12 medium whole carrots
  • 1 Tbs. Olive oil (or oil of choice)
  • Salt and pepper
Directions
  1. Turn oven on at 400* F.
  2. One at a time, peel, chop off top end of carrot, and cut into 4 inch pieces. Throw other end away.
  3. Cut each 4 inch piece into 4 long horizontal skinny pieces or 2 long skinny pieces depending on the thickness of the carrot.
  4. Place all prepared carrots into a ziplock bag, pour in the tablespoon of oil, sprinkle in some salt and pepper and close bag well.
  5. Move carrots around and rub all the delicious oil and seasonings as evenly as possible.
  6. Spray oil onto a baking sheet, dump carrots, and move them into a single layer on the pan. 
  7. Cook for 20 mins on top rack, move onto bottom rack (my lazy way of not having to flip them) for 10 minutes. Check to make sure they are done. If not ready, cook up to 10 more minutes. Mine were done at 30 minutes total, but all ovens are different. 
  8. You can serve with the ketchup recipe given in the original recipe or enjoy plain or with regular ketchup. All ways were amazing!

Tuesday, September 23, 2014

Totally Simple Crock Pot Teriyaki Chicken

Things have gotten REALLY crazy in my home lately! We had family visiting for 3 weeks, a birthday party for my oldest son, and my baby has become extremely active. Life as we know it....has changed forever! For this reason, I am going to make my blog post a lot more simple. I probably won't have much time to come up with my own stuff, but I will continue to share recipes that I have adapted. I really enjoy helping others out with meal ideas (especially healthy and SUPER SIMPLE ones!), and it also gives me a great way to save my own favorite recipes (just in case Pinterest ever crashes..hey..you never know).

I found this Totally Simple Crock Pot Teriyaki Chicken on Pinterest. You can see the original posting here. I absolutely LOVE this recipe, and so has everyone else that has ever eaten it. It was a hit with toddlers, husbands, girlfriends, guy friends, and me! Plus, it is dairy free, gluten free, crock pot friendly (which means minimal prep and you can leave the house while it cooks!), egg free, nut free, and delicious. I would even bet that you could use all the ingredients for this and make it with tofu for a Vegetarian friendly dish. Hmmm.. I must try that soon!


Totally Simple Crock Pot Teriyaki Chicken
(Can be gluten free, dairy free, egg free, nut free)
Makes 10 pieces

Ingredients
  • 5 pieces of boneless skinless chicken thigh
  • 5 pieces of boneless skinless chicken breast
  • 1/2 cup soy sauce (use wheat free if avoiding gluten)
  • 1/2 cup honey, maple syrup, pancake syrup, or sugar free syrup
  • 2-3 Tbs minced garlic

Directions
  1. Spray bottom of crock pot with olive oil spray (or oil of choice).
  2. Place all pieces of chicken in the crock pot in one layer (all touching the bottom of the pot). I like to arrange them sporadically to get some of the thigh flavor into the breasts.
  3. Evenly pour 1/2 cup soy sauce over the meat.
  4. Evenly pour 1/2 cup honey or syrup on top of the soy sauce.
  5. Drop 2-3 Tbs of minced garlic onto the chicken and then spread evenly over the chicken with a spoon. 
  6. Turn crock pot on low heat for 3 hours.
  7. Flip chicken and cook on low heat for 2 more hours.
  8. Enjoy with rice and veggies on the side. 
Option 1: Steamed rice with steamed veggies on top (all made in a rice cooker). The easiest and quickest way to make this a full meal. 
Option 2: Make fried rice and stir-fry veggies to make the meal a little more exciting :)
Notes:
If you will not be home at the time the chicken should be flipped, it is perfectly fine to just set the crock pot for 5 hours on low and leave it. I just like to flip it half way to make sure every inch of the chicken gets soaked in the juice. If low on time, you can also cook on high for 2-3 hours. 

Monday, August 18, 2014

Gluten Free, Dairy Free Homemade Dark Chocolate

Last week a wonderful thing happened to me! I was browsing Pinterest (have I ever mentioned how much I am thankful for Pinterest??) and found an amazing recipe. It is a 3 ingredient, no cook, takes 5 minutes to prep recipe for HOMEMADE dairy and gluten free dark chocolate! *Claps hands and jumps up and down excitedly* :)


I. Love. Chocolate. A Lot. When I realized how much dairy negatively affected my body, I thought I could never have chocolate again. BUT then I learned about the wonderfulness of dark chocolate. Growing up we never had dark chocolate in the house. This was all before the huge dark chocolate craze began. Before all the health benefits were made known to the world. Before it was made clear how much healthier dark chocolate is than it's sugar filled companions. It took some time before I fell in love with the rich, dark smoothness and prefered it over the milk filled sweeter kind, but once I fell... I fell hard. I would never go back to milk chocolate even if I could. I typically choose the 60%-70% darkness as it's not quite so slap-you-in-the-mouth dark but just right.

You can find the original recipe here. Please check her out and give her some love! There are a handful of bloggers that I usually follow and find tons of great recipes I can incorporate into my diet. This was the first time I had ever come upon this website, and I have to confess I'm really excited to poke around more to see what delicious goodies I can find. I basically used her recipe but changed a couple small details, so all credit goes to her!


Gluten Free, Dairy Free Homemade Dark Chocolate
(Gluten free, dairy free, egg free, nut free, grain free, refined sugar free, Vegetarian, can be Vegan if not using honey)
Makes 12 pieces

Ingredients
  • 1/3 cup melted coconut oil
  • 1/3 cup cocoa powder, unsweetened
  • 2-3 Tbs sugar free pancake or maple syrup, regular pancake or maple syrup, or honey

Directions
  1. Put all ingredients into a small bowl and stir together until smooth and no lumps remain.
  2. Pour mixture into a mold, ice cube trays, or even into a mini cupcake pan. (I got my mold at Ikea. If you do not live near an Ikea, you can also get them on ebay. Look here for some options.)
  3. Place immediately into freezer.
  4. Once chocolate is hardened, pop out of container and place in a freezer bag. Best stored in the freezer.

Notes
-When these first reach their hardened state, they are a darker brown color, but the longer they stay in the freezer they become lighter brown. This does not affect the taste at all. They are still just as rich and delightful!
-If these are not sweet enough for you, feel free to add some stevia or other sweetener of choice to your preference.
-This chocolate has a mild coconut taste, but it is not overwhelming.
-Coconut oil can be pricey, but if you buy it online and use it wisely it can be a great addition to your pantry!
-As with all foods, consume in moderation. Cocoa and Coconut oil in excess can cause some stomach issues.

Nutrition Facts:
(per piece with 3 Tbs sugar free pancake syrup)
Cals-60, Fat-6.4g, Carbs-1.3g, Pro-0.4g

(per piece with 2 Tbs. honey)
Cals-69, Fat-6.4g, Carbs-4.2g, Sugar-2.8g. Pro-0.5g

Friday, August 8, 2014

Sweet & Savory Black Bean Tacos

The other day I had a hankering for tacos, but not just the average Mexican taco most of us have eaten several times in our lifetimes. Those tacos are full of unhealthy and artery clogging fats, simple carbs, and almost zero vitamins or nutrients. No.. I wanted a transformed healthy version of a taco, but it had to taste AMAZING.

As I looked online for ideas to incorporate into my new melt-in-your-mouth tacos, I kept seeing a couple food combos over and over again: sweet potato and black beans, black beans and avocado, black beans and lime. But I never saw anything that had all of these flavors placed together into one dish. I had my idea for a new, healthy, delicious taco! This is how the Sweet & Savory Black Bean Tacos came to be... full of sweet potato, black beans, & avocado with a squeeze lime. 


For just 323 calories, 9g of heart healthy monounsaturated fat, and 13g of fiber, you get two filled to the brim flavorful tacos per person. I chose to use Mission super soft corn tortillas (they hold up very well when filled up without falling apart unlike other corn tortillas with only 100 calories for 2 tacos), but you can choose to use hard corn tortillas or one very large flour tortilla in their place (I do not know the nutrition facts for those).


The secret to making this a super fast dish to throw together on a weeknight is to cook the sweet potatoes a night or two before needing them while relaxing at home with your family. Cook sweet potatoes in a covered baking dish in an oven at 350F degrees for 90 minutes. Let them cool and store them in a covered container for up to three days. When ready to use them, just grab them out of the fridge and quickly heat them up either in the microwave or on the stove. Easy Peasy! :)

The avocado is simply cut in half, scooped out, and smashed on top of the sweet potato.

The beans can be from a can or cooked 2-3 days before and stored in the fridge until ready to use. Then when the time comes to make this dish, you only have to quickly heat them up just like the sweet potatoes.

The tomatoes can also be bought already diced in a can or fresh and cut by you. You only need 1/2 beefsteak tomato or 1 plum tomato (1/2 cup chopped), and it will take a mere minute to prepare it to eat.

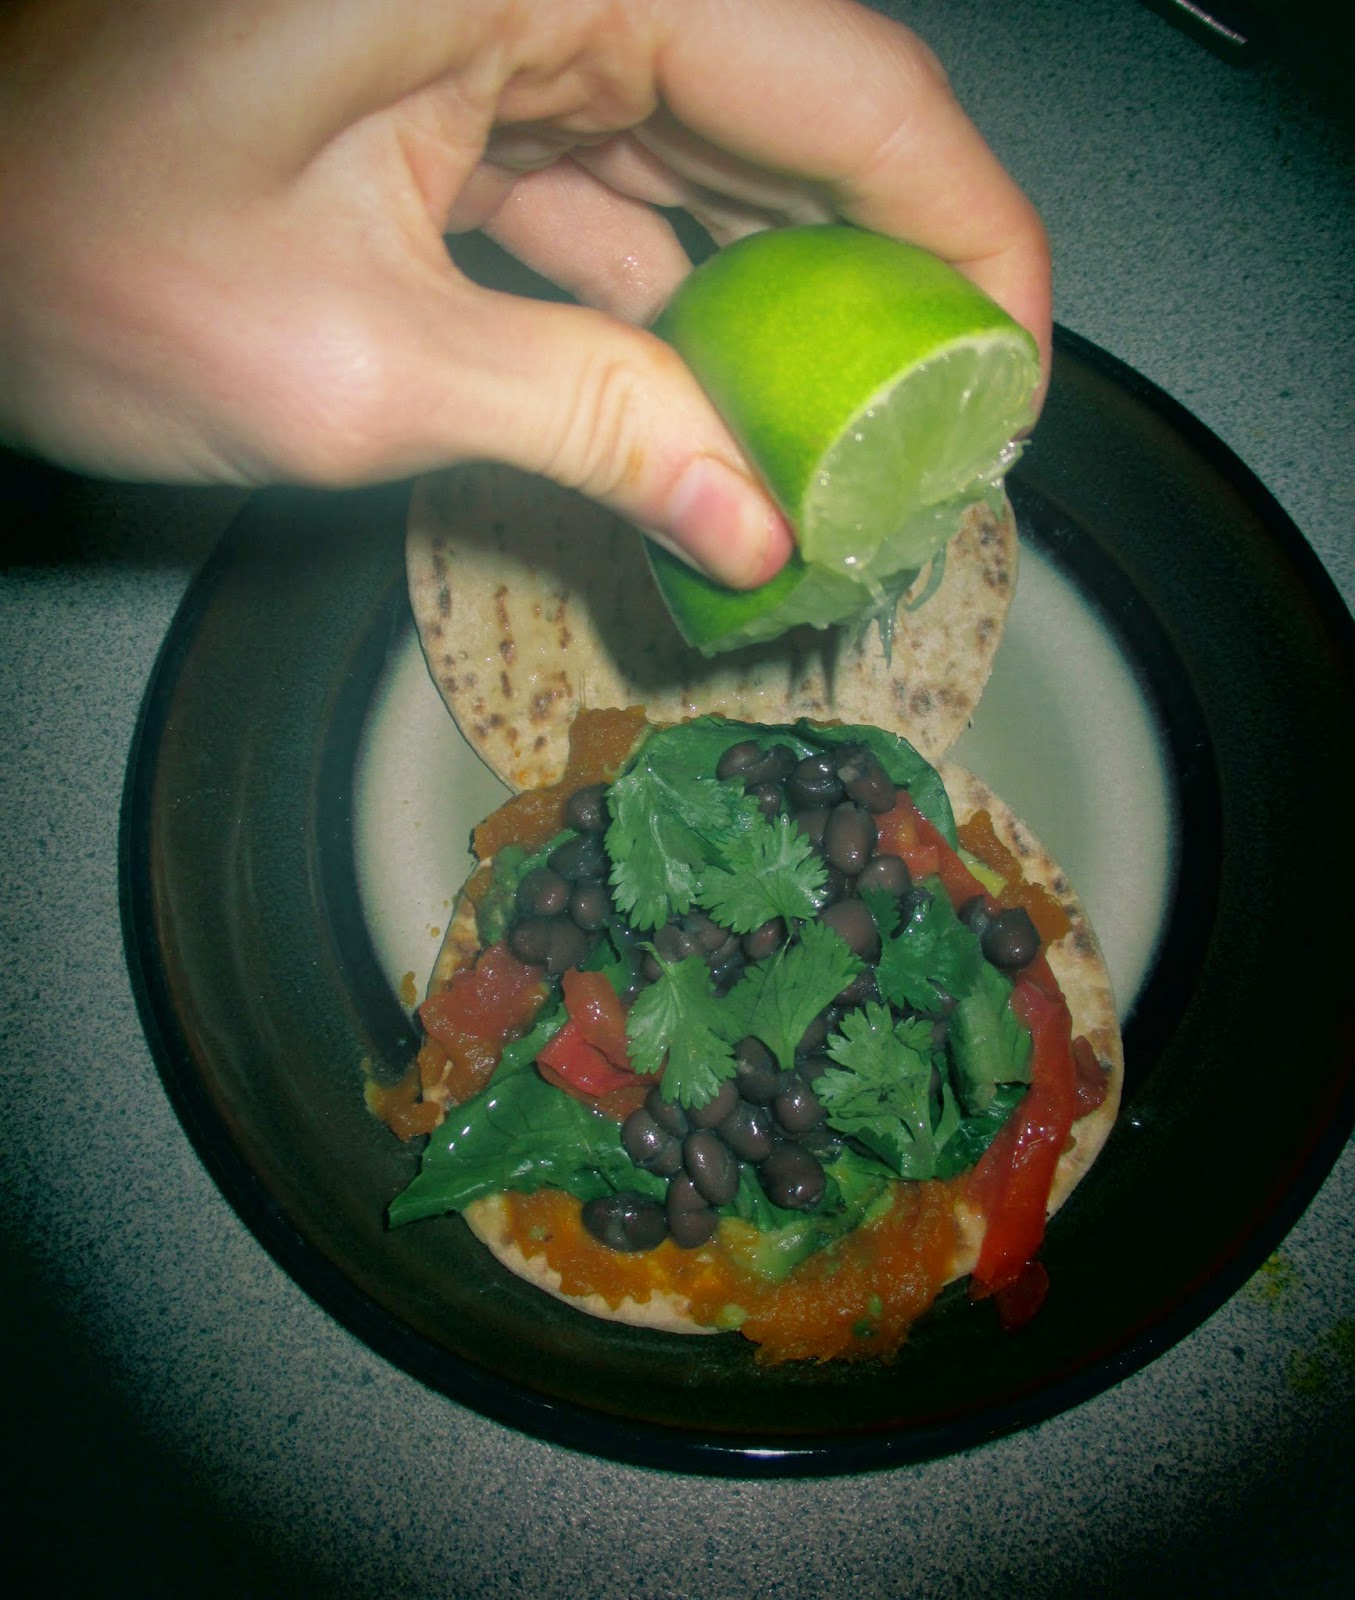
Throw some cleansed romaine lettuce and cilantro on top of the pile, and finish this amazing dish with a squeeze of fresh lime on top.

With just a little bit of planning ahead, you can have a healthy, finger-licking dinner on the table in minutes to fill those hungry tummies after a long day.


Sweet & Savory Black Bean Tacos
(Can be gluten free, dairy free, egg free, nut free, soy free, added sugar free, Vegan, Vegetarian
Serves 2 (Can easily be doubled for 4 or tripled for 6)

Ingredients
  • 4 Mission Super Soft Corn Tortillas (or 4 hard corn tortillas or 2 large flour tortillas)
  • 1/2 cup cooked sweet potato (2 Tbs per taco)
  • 1/2 of a ripe avocado (1/8 per taco which is about 1 Tbs)
  • 1 cup romaine lettuce strips (about 1/4 cup per taco..use your judgement how much will fit)
  • 1/2 cup diced tomatoes: can use 1/2 beefsteak tomato or 1 plum tomato (2 Tbs per taco)
  • 1/2 cup cooked black beans (2 Tbs per taco)
  • 1/2 cup fresh cilantro (2 Tbs per taco) (optional)
  • 2 tbs or more of fresh or bottled lime juice (1/2 Tbs per taco) 

Directions
  1. Prepare, cook, and store the sweet potatoes in the fridge ahead of time.
  2. Soak and cook the black beans ahead of time and store in fridge if using fresh beans.
  3. When ready to make the dish, heat up 1/2 cup of the sweet potatoes and 1/2 cup of black beans either in the microwave or in a pot on the stove.
  4. Dice the tomato until you have 1/2 cup or open the can of prepared diced tomatoes. 
  5. Chop the romaine lettuce until you have about 1 cup of strips. 
  6. Tear off the cilantro leaves and throw away the stems. 
  7. Cut the avocado and lime in half.
  8. Spray a pan and heat up each tortilla one at a time on each side until slightly browned. 
  9. While heating each tortilla, cover the cooked ones on a plate to keep warm.
  10. To make taco lay tortilla down, rub 2 Tbs sweet potato on top, scoop out 1 Tbs avocado, and mash onto potato.
  11. Lay down 1/4 cup of lettuce, 2 Tbs of tomato, and 2 Tbs beans in that order.
  12. Garnish with cilantro if desired and squeeze lime on the very top. 
  13. Fold and take a tasty bite :)


Nutrition Facts:
(for 2 tacos)
Cals-323, Fat-9g, Carbs-54.5g, Fiber-13g, Sugar-7.5g, Pro-10g 

Tuesday, August 5, 2014

Light Blueberry Delight (the sneaky way)

Last week I posted a recipe called Light Blueberry Delight. I've had great feedback about how good these were from friends who have made them already! (Thanks for letting me know by the way!) I've also had comments about how some family members do not like blueberries and picked them out before devouring the cake part. :)

The original delightful treat

The great news is that I have a solution for those of you who have decided that blueberries can not be a part of those loved one's diets. With just ONE very simple modification, you can make this healthy delicious dessert WITH the blueberries and have your berry haters eat it! To go to the original recipe click here. I will not be reposting the whole recipe in this post but just giving you the simple step to change it. 


In the first step of the recipe, while blending the banana, we're going to blend the blueberries too! After blending the bananas down half way, add the 1/3 cup of blueberries and continue to blend until all of it is smooth with no chunks. You may need to add a little bit of water if it gets stuck and cannot blend any more. 


This is how it should look before you put it in the oven. If you have a super aware detective on your hands who can spot slight specks in their dessert from a mile away followed by an "ew gross!" then try sprinkling a few chocolate chips across the top of the batter before you put it in the oven (like in this picture). I only put chocolate chips on half and left the other half without for the more health conscious folks. If a little chocolate doesn't persuade them, nothing will! Ha! My family loves these every single way I have ever made them. If you didn't win yours over the first time you made this, try one of the other 2 suggestions. Please let me know if you made these and what everyone thought! Thanks for stopping by!


Tuesday, July 29, 2014

Light Blueberry Delight

About a month ago, I started working on a healthy brownie makeover. With all the juicy fresh blueberries all around me, I kept getting distracted from all the "chocolate only" brownie ideas I had to more of a fruity brownie. As I continued to experiment, I came up with something much better than a healthy brownie. I came up with a Light Blueberry Delight.


These delightful treats have a smooth texture with a POP of blueberry and a hint of chocolate in every piece. They are not too sweet but just right. These beauties contain 3 different healthy fruits, egg whites, a bit of olive oil, and cocoa powder which gives us some antioxidants.

I'm so proud of this yummy dessert that
 I even took a picture with it! Hehe!

I have made these at least 8 times. I wanted to make sure they were perfect and am very pleased with them! I had the pleasure of making these with my niece one of those times. She was such a great helper and had so much fun. It makes it much more enjoyable when all ages can join in on the baking fun! Another fabulous thing about this recipe is that it only takes 13 minutes to cook and minimal time to prep. Fast, delicious, and healthy. What's not to love??

Banana pureeing champ 
Gotta love my freshly washed hair and my cute niece giving you all a kiss :)

Light Blueberry Delight
(Can be gluten free, dairy free, nut free, refined sugar free, soy free, Vegetarian)
Makes 16 squares

Ingredients
  • 3/4 cup gluten free all-purpose flour (can also use all-purpose wheat based flour)
  • 1/4 tsp baking powder
  • 3 Tbs cocoa powder, unsweetened
  • 2 packets of Stevia or sweetener of choice (4 grams; 4 tsp) 
  • 1/4 cup egg whites or 2 egg whites from whole eggs
  • 1/4 cup applesauce
  • 1/4 cup olive oil
  • 1 medium banana, pureed
  • 1/3 cup fresh juicy blueberries

Directions
  1. To make this recipe as easy as possible, puree your banana first. This dessert tastes best when the banana is smooth and not chunky.
  2. Turn oven on at 350F degrees.
  3. Place the flour, baking powder, cocoa powder, and sweetener in a large bowl. Mix together.
  4. Place egg whites, applesauce, olive oil, and pureed banana in a medium bowl and mix well together.
  5. Put wet mixture into the bowl with the dry ingredients and mix well. 
  6. Throw in the blueberries and stir well but gently to get the blueberries equally spread into the batter. 
  7. Grease or spray oil into an 8 x 8 baking pan. 
  8. Empty batter into the baking pan and spread evenly covering the bottom of the pan. Make sure there are blueberries throughout the mixture so that each cut piece will have the juicy pop of berries when eaten.
  9. Cook in oven for 13 minutes (Check at 10 minutes and again at 12. Depending on your stove you may not need the full 13 minutes or a little more, but every time I made these they needed exactly 13 minutes. When done these should be solid but not hard. You don't want these crunchy!)
  10. Take out of oven to cool, cut when cool into 16 squares, and enjoy!
  11. Can store in a container on the counter for 2 days in hot weather and 3 days in cool weather. Can also keep in fridge for 5-7 days. I have not tried to freeze these yet. They are always eaten before I get a chance! :)

Nutrition Facts:
(per bar)
Cals-63, Fat-3.8g, Carbs-7.5g, Fiber-1g, Sugar-1.5g, Pro-1.5g

Saturday, July 19, 2014

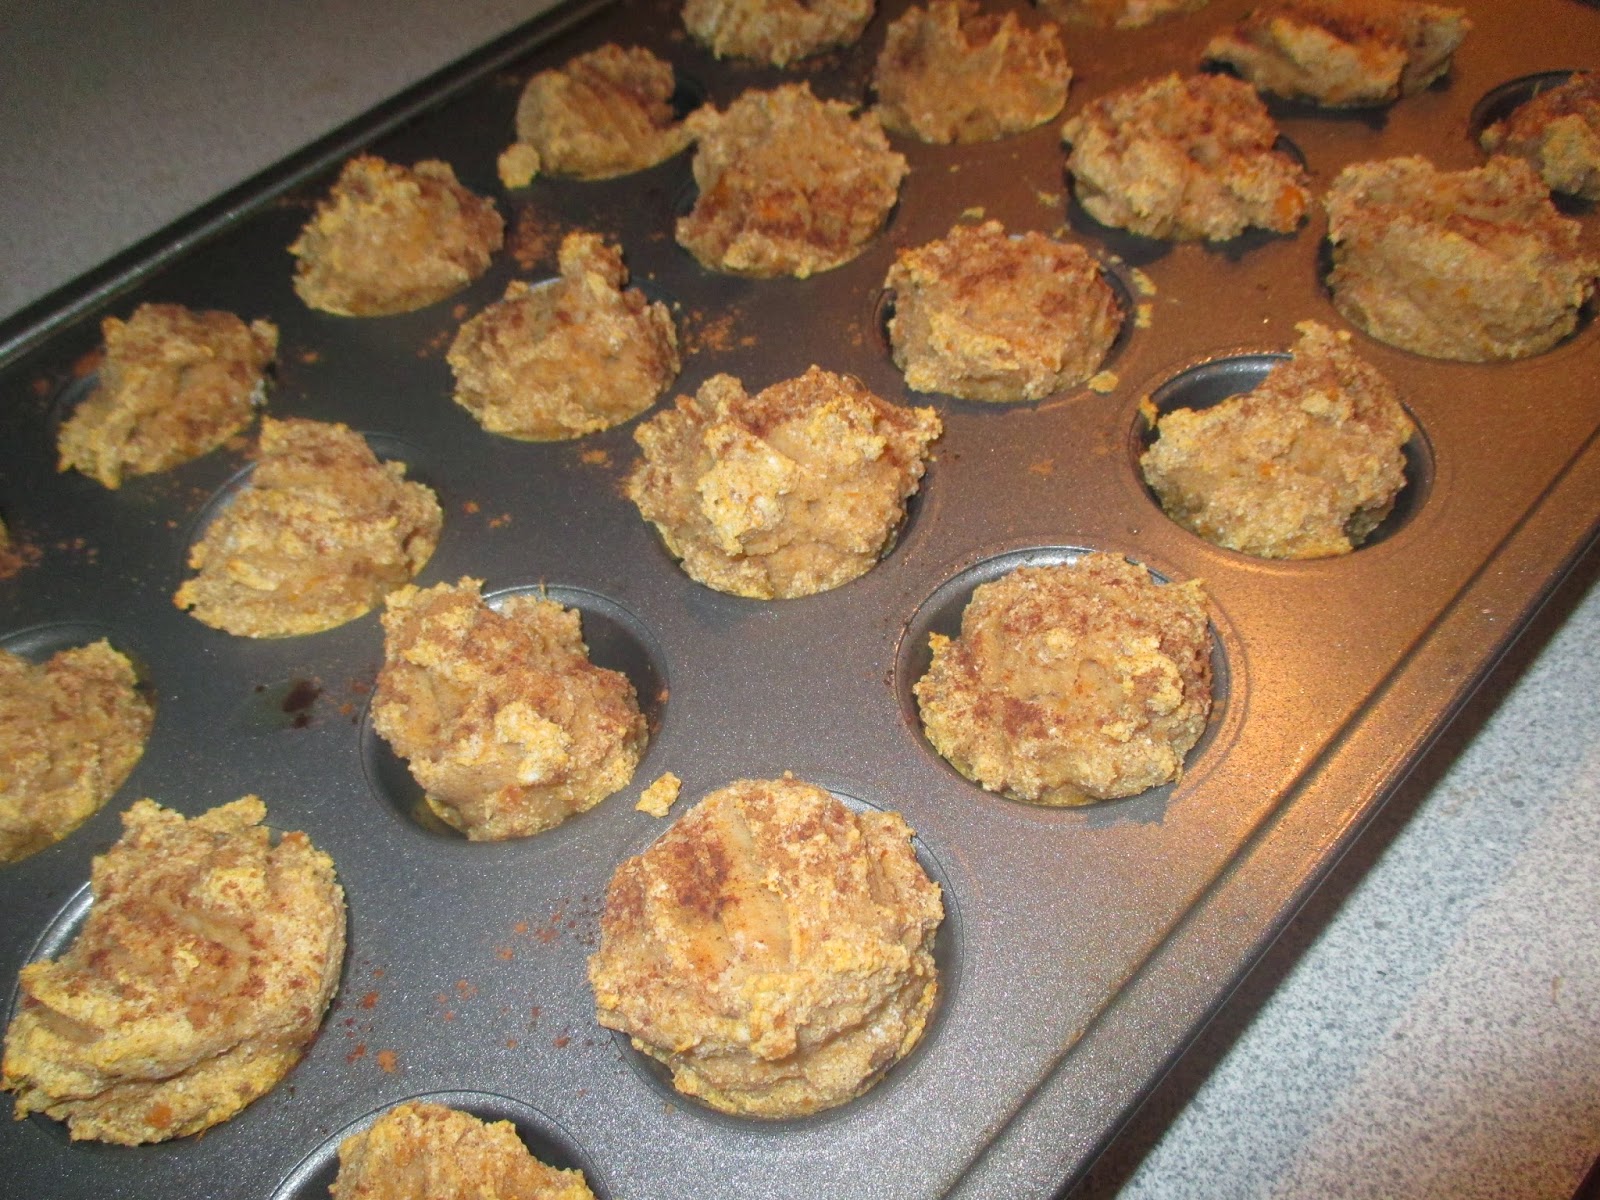
Mini Sweet Potato Oat Muffins

Ever since I found out just how bad sugar is for us, I have made it my goal to remove refined sugar and even limit simple sugars as much as possible from my family's diet. It wasn't easy at first, but with a lot of practice and even several goof-ups I have learned a lot of ways to adapt foods into much healthier options. The good news is I still challenge myself to create a broader list of healthy recipes that we can enjoy, and then I can share with you!

When I first started changing the way I prepared food, in a sweet dish, I would substitute Splenda for the sugar. As I got more knowledgeable in the art of cooking and learned more about Splenda, I would only use Splenda for half the sugar and increase the amount of fruits or sweet vegetables already in the recipe to make it healthier but still taste great. Now that I've been cooking this way for years and looking to make our meals and snacks even healthier, I am aiming to stop using Splenda except on very rare occasions, only use small amounts of Stevia when necessary, and replace the sweet flavor with whole foods like fruits, vegetables, etc. THIS is not an easy task my friend. It sometimes takes me 3-5 attempts to perfect a recipe. I mean.. I'm not complaining because although these attempts are not PERFECT..they still taste good, and my son and I happily consume them (a little too much sometimes haha).
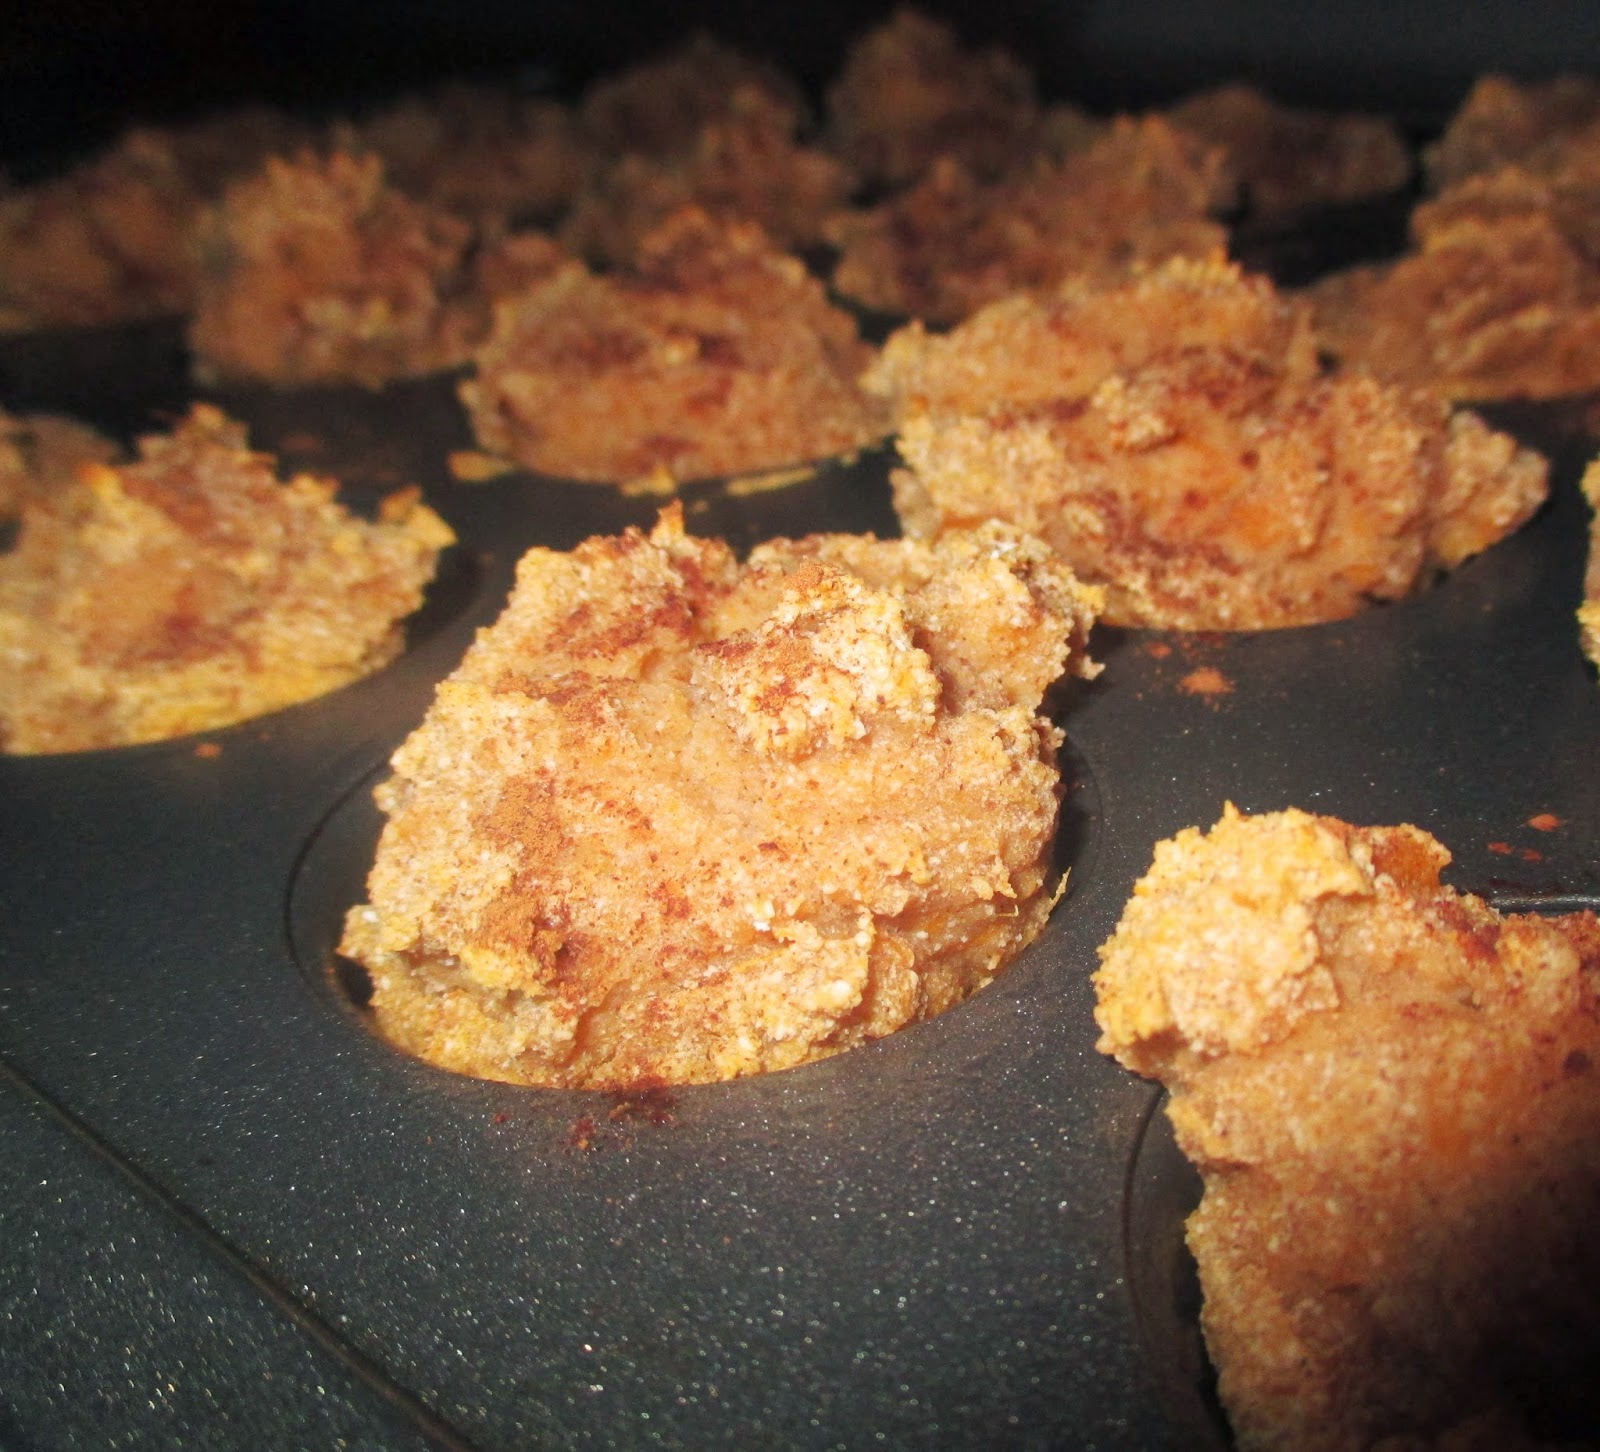
You can make these with extra cinnamon sprinkled on top.

We really love muffins in this house. My almost 3 year old even likes to help me make them! It's super fun for the whole family. They're also a great homemade snack with no preservatives, and I know what is in them! They're a great size for a quick on the run bite or for tiny hands to hold.

Recently I've been adapting most of my muffins with bananas, and to be honest I am getting tired of bananas. I decided it was time to experiment with another fruit or vegetable. I chose sweet potatoes. Even though the summer is not the harvesting season for sweet potatoes, I am just so glad they are available year round, and I can cook with them when I get the urge. I confess I am not so obsessed with health food that I try to do everything absolutely perfect. I see greatness in moderation and doing what we can the best we can. As far as I'm concerned, the super fabulous health benefits of sweet potatoes far outweigh eating them out of season. Did you know that cooked sweet potatoes are packed with Vitamins AB6C, thiamin, niacin, riboflavin; potassium; alpha- and beta-carotene antioxidants; and fiber? Whoa! Super food indeed! I also really love the addition of oat bran in these muffins. Oat bran is a great source of fiber and protein just like oatmeal! Let me know how your muffins turn out and what you think of them! Thanks for stopping by!
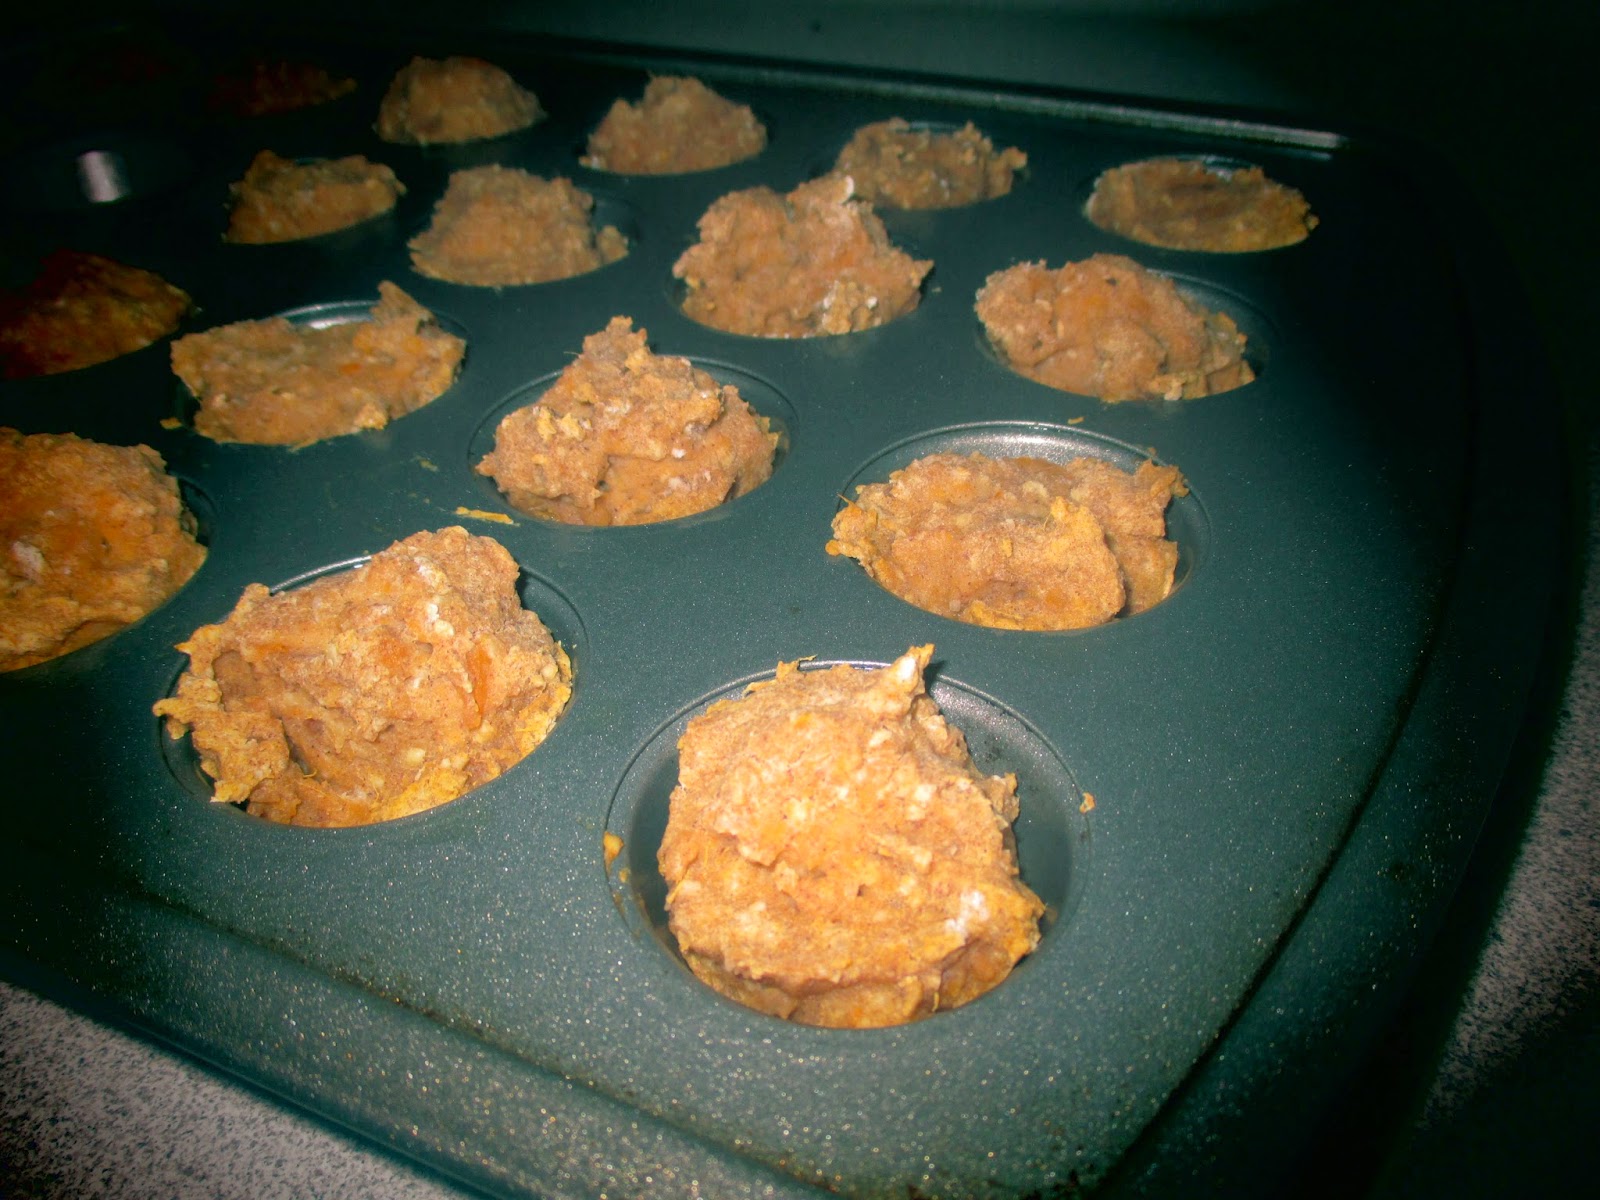
You can also leave the extra cinnamon off the top and still enjoy
the rich spices immersed in these babies.

If you really  like these muffins and are interested in trying out more fruit sweetemed muffins, check out these super quick and easy banana muffins here!


Mini Sweet Potato Oat Muffins
(Can be gluten free, dairy free, nut free, egg free, soy free, refined sugar free, Vegan, Vegetarian)
Makes 24 mini muffins or 12 regular size muffins

Ingredients
  • 1 cup gluten free all-purpose flour (can also use all-purpose wheat flour)*
  • 1/2 cup oat bran*
  • 1/4 tsp baking powder
  • 1/4 tsp baking soda
  • 1 tsp cinnamon
  • 1/2 tsp pumpkin pie spice (If you don't have this at home, increase the cinnamon to 1 1/2 tsp and leave this out.)
  • 1 tsp vanilla
  • 1 cup pureed/mashed sweet potatoes (Puree if there are still chunks left after baking.)**
  • 1/8 cup olive oil
  • 3/4 cup unsweetened applesauce

Directions
  1. In a large bowl combine flour, oat bran, baking powder, baking soda, and spices and set aside. 
  2. In another bowl mix the vanilla, sweet potatoes, oil, and applesauce. 
  3. Pour the wet ingredients into the dry and mix well. 
  4. This is when I usually turn my oven on to 325F degrees and spray my mini muffin pans with spray olive oil. Turning the oven on before this seems to just waste electricity and unnecessarily heat my house as my muffins cook perfectly well doing it this way.
  5. Place muffin mixture in the sprayed pan cups (feel free to use paper baking cups if desired).
  6. Bake for 10 minutes for mini muffins or 20-25 minutes for medium size muffins. 
  7. The muffins will feel soft when you take them out of the oven but will harden perfectly once they have cooled. 
  8. If you desire, now sprinkle a little more cinnamon on top of the muffins for added flavor and decoration.
  9. Since these don't contain any preservatives and are all-natural and fresh, please consume within 2 days in hot weather or 3 days in cooler weather. They will also last 5-7 days stored in a closed container in the refrigerator or up to 3 months in a freezer bag in the freezer. You can eat them cold or heat them up in the microwave for 20-30 seconds to enjoy.
Notes:
*If you do not have any oat bran or do not like it, you can use 1.5 cups of all-purpose flour instead of the 1 cup of flour and 1/2 cup of bran. This will make the muffins a lot more cakey. If you do use the 1.5 cups of flour, increase spices to 2 tsp cinnamon and 1 tsp pumpkin pie spice or 3 tsp cinnamon.
**How to prepare sweet potatoes: 1) Place washed whole sweet potatoes on a greased baking dish, cover dish with tin foil, and cook for about 90 minutes at 350F degrees. The potatoes should be very soft to the touch. If not cook another 30 minutes. 2) After the potatoes have cooled quite a bit, removed skins and eat it or throw it away (I like to eat it since it's so nutritious). If you cook the sweet potatoes long enough they should be incredibly soft and already in a mashed state, but if there are some chunks left put the orange flesh into a food processor or blender and puree. If not using right away, store in a sealed container in the fridge for a couple days. This is a great way to prepare your sweet potatoes ahead of time and store to use for a recipes later on in the week!

Nutrition Facts: 
(for 2 mini muffins made with oat bran)
Cals-102, Fat-3.3g, Carbs-18g, Fiber-3g, Sugar-3g, Pro-2.5g

(for 2 mini muffins made w/o oat bran and only flour)
Cals-99, Fat-2.9g, Carbs-18g, Fiber-2.5g, Sugar-3.5g, Pro-2g


Wednesday, July 16, 2014

A Perfect Bite of Egg Whites

I am a huge fan of egg whites. On the other hand, my body only tolerates egg yolks when the whole egg is made into scrambled eggy goodness. For some reason, egg yolks upset my stomach so I try to avoid them when I can. Carton egg whites have been great for me since I don't have to worry about throwing out the part of the egg I don't use OR trying to figure out how to use 12 egg yolks (I've only done that once... that cake was probably the epitome of unhealthiness haha).


One of my favorite ways to eat eggs is boiled. The sad part is that once again I'm throwing away perfectly good, beautifully yellow egg yolks because I know that I will regret eating them later. This is why one day I decided to find a way to bake egg whites that have a similar consistency to boiled egg whites without having to waste the yolks or make a mess (or stab myself) with the shells. Hence, A Perfect Bite of Egg Whites was made!


These are so incredibly easy to make! At the end you also only have ONE dirty pan to clean. Isn't that FANTASTIC?? These perfect little bites are great to throw into a salad, eat with your breakfast for added protein, eat a few as a post workout snack, or to enjoy as an "I like egg whites" snack.


And if the sound of only ONE dirty pan makes you really happy, you can even make two recipes at once to reduce the amount of cooking time (extra unwanted heat in the summer) and one less pan to wash at the end of the day. As you can see in the picture above, I made this recipe and Healthy Melt in your Mouth Chocolatey Muffins in the SAME PAN. Genius right?? They take the same amount of time and the same temp to bake, so you can "kill two birds with one stone" (not that I'd ever kill a REAL bird ;)).


A Perfect Bite of Egg Whites
(Gluten free, dairy free, nut free, sugar free, no carb, Vegetarian)
Amount of servings depends on how many you make. 1 serving is 1 egg white bite.

Ingredients
  • 100% Liquid Egg Whites or Egg Beaters (or you could use egg whites separated from whole raw eggs)
  • Herbs of your preference (salt, pepper, italian seasoning, cayenne, ect.)
  • Spray oil

Directions
  1. Turn oven on at 325F degrees.
  2. Spray each muffin cup with the spray cooking oil.
  3. Pour 1/8 cup of liquid egg whites into each muffin cup.
  4. Sprinkle the tops of each egg with herbs of your choice. Be careful not to sprinkle TOO much or the taste with be overbearing. 
  5. Put pan into the oven and cook eggs for 10 minutes. 
  6. Remove and let cool when done. 
  7. Store in a closed container in the refrigerator for up to 1 week. (It's so awesome how long these can stay stored in the fridge without going bad as well! Super perfect snack!)


Notes:
If you desire more flavor, feel free to pour your egg whites into a bowl, throw in some shredded dairy or dairy-free cheese and mix together. Then use a 1/8 cup measuring cup to pour the mixture into the pan cups. Sprinkle herbs on top and cook. 

Nutrition Facts: (per mini egg white bite without cheese)
Cals-17, Fat-0g, Carbs-0g, Fiber-0g, Sugar-0g, Pro-3.3g


Tuesday, July 8, 2014

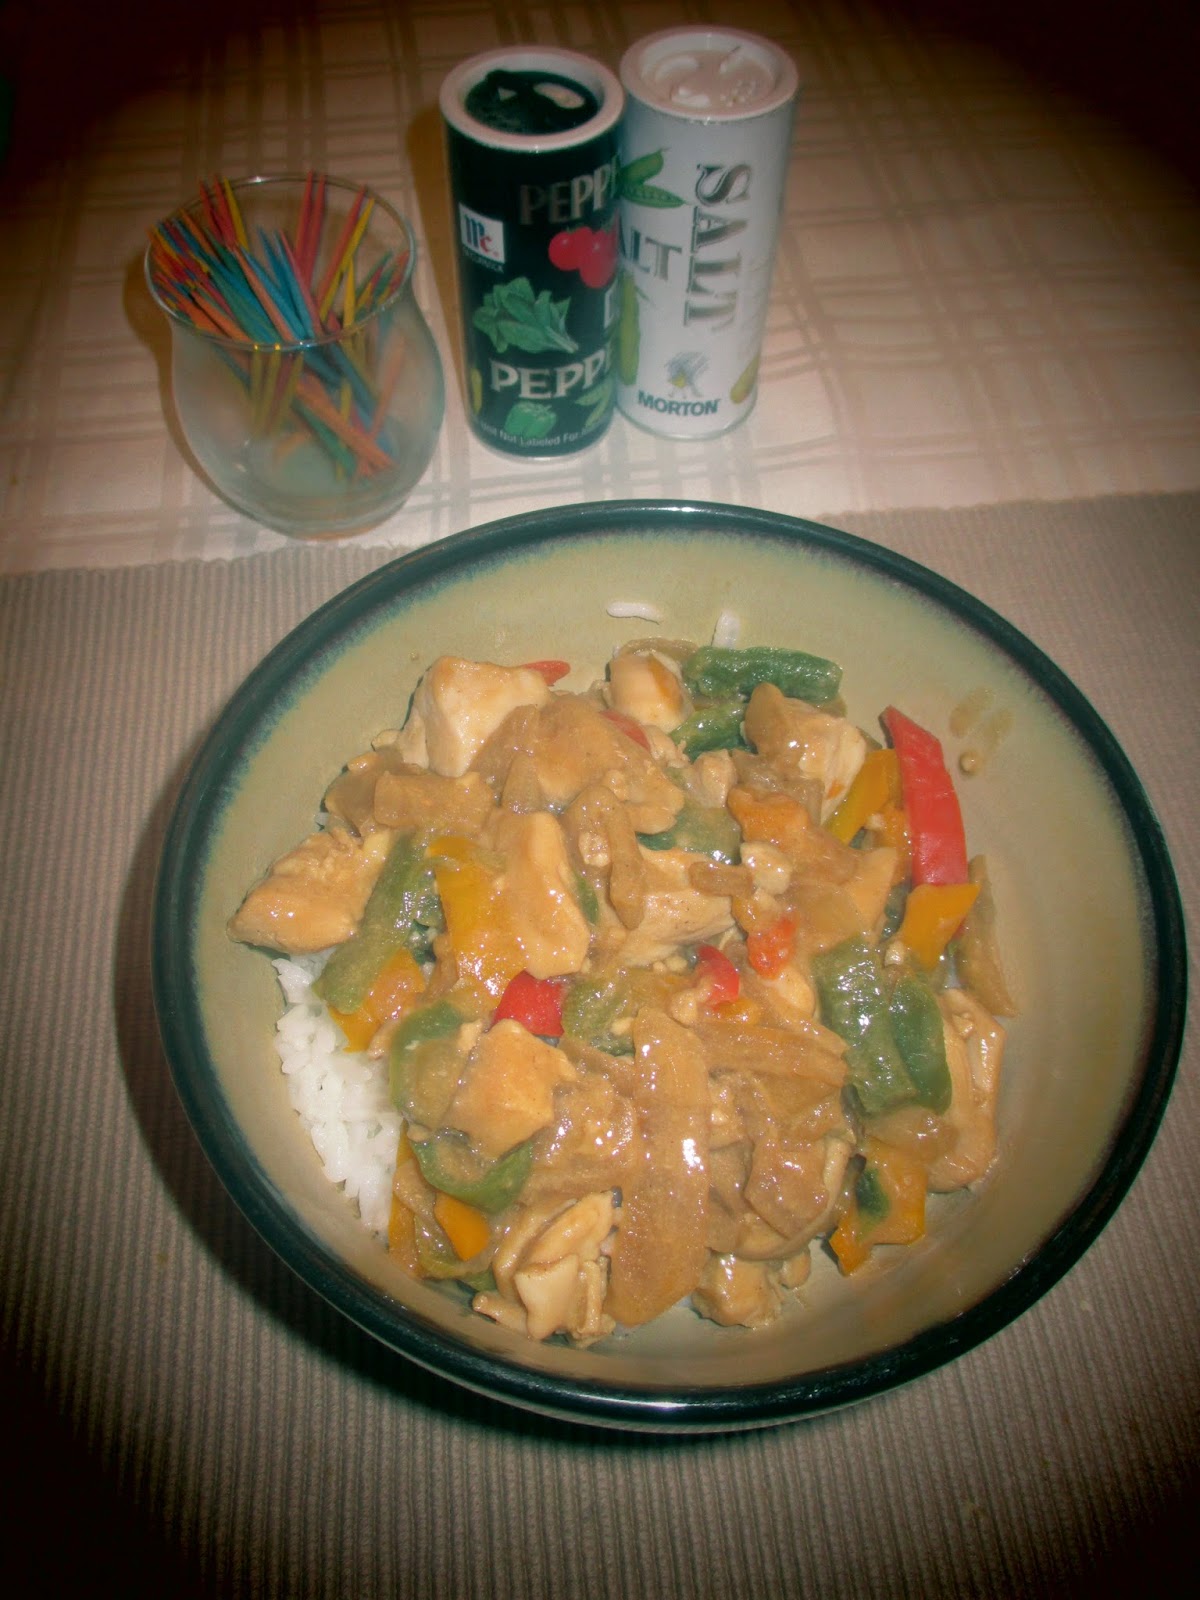
Thai Peanut Chicken Stir-fry

This VERY simple and flavorful dish is one of my family's favorites! The way this recipe came to be a staple in our meal rotation is kind of funny. Do you remember when Walmart used to have recipe cards around the produce section that you could take home? I haven't seen those in a long time, but I used to enjoy checking them all out and picking up the ones that looked like a possibility for us (this was definitely pre-babies when I had lots of time to meander haha). One day I found a recipe for Thai Peanut Chicken Pizza. We love peanut butter in my family (like I haven't said that a million times already), so I was really excited to try this out! Once I got home I thought about it and realized I really shouldn't make pizza. Every time I eat pizza I get a huge blood sugar crash. I wanted stir-fry! Thus, the Thai Peanut Chicken Stir-fry was born! I added more vegetables and swapped rice (noodles or salad greens also work!) for the crust. Of course I also had to completely change up the way it was cooked. It was such a great idea, and I'm glad I ventured out and tried something new!


You probably already have all of these ingredients on hand. Nothing in this recipe is unusual or special. It's a whole food, healthy, quick, and delicious meal. Even though my 2.5 year old is not a huge meat fan, I can easily pour the peanut butter sauce on top of his rice or noodles and know he's getting his necessary carbs, protein, and fat. No need to cook anything special or separate. Everyone in your family will love this dish! If the men or growing teenagers in your family eat everything in sight, encourage them to add a salad on the side of this meal with tons of juicy colorful vegetables and some extra virgin olive oil and balsamic vinaigrette on top. That sound fill them up. ;)


Thai Peanut Chicken Stir-fry
(Can be gluten free, dairy free, egg free, refined sugar free, low carb if made into a salad)
Serves 3 people

Ingredients

Meat:
  • 3 boneless chicken breast, cubed (3 ozs each)
  • 1 tsp olive oil*
  • 3 tbs soy sauce
  • 2 cups chopped bell peppers
  • 1 cup chopped onions
Sauce:
  • 2 tbs stevia, sugar, or choice of sweetener
  • 2 tbs creamy natural peanut butter
  • 3 tbs soy sauce
  • 1 tbs garlic
  • 2 tbs corn starch
Optional additions:
  • Brown rice (do not use more than 1/2 cup cooked)**
  • Noodles (whole wheat, somen, udon, rice) (do not use more than 1/2 cup cooked)**
  • Salad greens (use as much as you want!)

Directions
  1. In saucepan combine all the sauce ingredients. Cook on medium-high until thickened.
  2. Remove sauce from stove and cover with lid to keep warm. 
  3. Put the olive oil and chicken in another pan. Cook on medium-high until chicken is no longer pink. Stir occasionally until done. 
  4. At the same time you begin the chicken, start the process to cook the rice or noodles. Let this cook while you wait on the chicken and vegetables to finish cooking. 
  5. Add peppers, onions, and soy sauce into the pan with the chicken and cook until vegetable are tender. Stir occasionally until done. 
  6. Combine the chicken, vegetables, and peanut sauce and stir together. 
  7. Serve on top of salad greens, rice, or noodles. 


Notes:
*If chicken starts to stick to the pan, add a little bit of chicken broth or cooking spray to the pan and stir. Continue to add and stir it in until the chicken is done. This will keep the calories and fat total to a healthy amount. 
**To keep this meal balanced and healthy do not use more than 1/2 cup of cooked carbs. Any more than that and your carbohydrates will be way too high and will cause a sugar spike and crash. 


Nutrition Facts: (per serving without rice or noodles)
Cals-294, Fat-11g, Carbs-25g, Fiber-3g, Sugar-8g, Pro-24.5g

(per serving with 1/2 cup cooked brown rice)
Cals-403, Fat-12g, Carbs-48g, Fiber-4.5g, Sugar-8g, Pro-27g

Friday, July 4, 2014

Sweet Potato Pie Smoothie

The past couple of weeks have been pretty crazy at our house. With a teething baby and little sleep, this momma is tired. We've been lucky if I even MADE dinner let alone come up with some new recipes to share with you. Thankfully over the weekend, with the hubster home, I had a little more energy and a desire to whip up this delicious smoothie I found several months back. The great thing is that I got this particular recipe from a dairy free website. It's been one of the best websites I have found since having to cut out the cow's milk. I highly recommend you to check it out at www.godairyfree.org. You can find the recipe I'll share with you today here. I did make a few changes to lessen the sugar and add a little more flavor from the spices. I think you'll like it! My crew sure did.

Don't you just love his cute little farmer's tan??

This is a Sweet Potato Pie Smoothie. Yes.. I did just put "pie" and "smoothie" in the same sentence. Who could say no to a delicious smoothie that tastes like pie??


I was curious what the technical difference was between a smoothie and shake since the name of the original is called a "healthy shake", and I personally would consider this to be a smoothie. Shakes taste good, but are NOT good for you while smoothies are generally packed full of great vitamins and nutrients. So I did what any curious person would do, and I googled it.

This is what I foundSmoothies typically are high in carbs but have a relatively low fat content -- unless high-fat ingredients like peanut butter are added. Smoothies are sometimes thought of as healthy alternatives to shakes, since they're often made from real fruit and a low-fat or protein-rich base, but those made from fruit-based ice creams or sherbets, juices and syrups can rack up over a thousand calories and feel more like a splurge than a diet drink. Milkshakes, on the other hand, normally contain a large amount of saturated fat and higher calories than smoothies. Even though they're loaded with sugar, however, they have a good amount of calcium and protein. (http://everydaylife.globalpost.com/difference-between-shake-smoothie-28382.html)

 A milkshake is a sweet, cold beverage which is made from milk, ice cream or iced milk, and flavorings or sweeteners such as fruit syrup or chocolate sauce. Outside the United States, the drink is sometimes called a thickshake or a thick milkshake or in New England, a frappe, to differentiate it from other less-viscous forms of flavored milk. A smoothie is a blended and sometimes sweetened beverage made from fresh fruit (fruit smoothie) and in special cases can contain chocolate or peanut butter. In addition to fruit, many smoothies include crushed ice, frozen fruit, honey or contain syrup and ice ingredients. They have a milkshake-like consistency that is thicker than slush drinks. They can also contain milk, yogurt or ice cream.(http://www.honeybellscookery.com/2012/05/milkshake-vs-smoothie-whats-difference.html

Anyways...this is the reason I named this tasty "dessert/snack/sweet treat just because" the Sweet Potato Pie Smoothie because to me this fruit filled, low sugar, low fat, and healthy drink is a perfectly cold summer alternative to those calorie laden, sugar filled, make you sick to your stomach shakes. Enjoy and please let me know what you think about this recipe!


Sweet Potato Pie Smoothie
(Can be gluten free, dairy free, egg free, refined sugar free, Vegan, Vegetarian)
Serves 2 (makes 1 cup each)

Ingredients
  • 1/2 cup cooked, pureed or mashed sweet potato*
  • 1 medium semi-ripe banana, broken into chunks (will work if frozen or fresh)
  • 1/2 cup unsweetened milk and 1/2 cup water (I use almond milk, but any will do)
  • 1/2 tbs ground flaxseed
  • 1 tbs vanilla flavoring or extract
  • Sprinkle of nutmeg, for garnish
  • Whipped coconut cream or whipped cream, for garnish (optional)

Directions
  1. Blend the first 5 ingredients until smooth. You shouldn't need more liquid, but if too thick add a little more milk and blend again.
  2. Poor into 1 cup of smoothie into two separate cups. 
  3. Sprinkle some nutmeg on the top (and cream if using). 
  4. Drink and Enjoy!

Notes:
*To prepare sweet potato bake in the oven at 350F degree for 90 minutes wrapped or covered with tin foil until very soft. Let potato cool so not to burn yourself. Scoop the inside out and eat or discard the skin. My blender is not great so I puree my sweet potato. You can also mash it. I usually do this step the day before and place the prepared sweet potato in the fridge until I'm ready to use it. Can also use it right away. 

Nutrition Facts:
(1 cup smoothie)
Cals-150, Fat-2g, Carbs-34g, Fiber-5g, Sugar-11g, Pro-2.5g

Tuesday, June 24, 2014

4th of July Watermelon "Cake"

As the 4th of July is coming up quickly, many of us are thinking of what fun patriotic treats to offer our families or guests as we celebrate our nation's freedom. I got this idea from an article in an All You magazine, but changed a few things to make it more dietary friendly. I also had lots of complications with the original recipe especially in this southern heat, and figured out a few ways to make it MUCH less messy and drippy (melting cream is not fun when trying to make a pretty dish).

If the cream wasn't melting so quickly, I would've made this much prettier,
but as I was rushing against the clock and heat
I just made sure the watermelon was covered.

I followed the original recipe step by step, using different ingredients, and although it was easy to make it was extremely messy and even more messy as I was cutting it. If you are planning on eating this at home and can keep it in the fridge until the very last moment, making it this way would be fine and it is actually really fun looking and pretty. You could even add berries on the top to give it more color and flavor. If you would like to transport this somewhere or will not have room in the fridge to store it, I encourage you to NOT make it this way. I will explain both ways in my directions. It was so delicious and refreshing I will definitely make it again. My hubby even ate it for breakfast this morning because he enjoyed it so much, and my son asked for seconds..and thirds after dinner! He called it "my cake" as he asked for more and more lol. :) One reason I encourage you to try this recipe with the cream is because of the fact that watermelon is high on the glycemic index. The fat in this yummy coconut cream will help to keep your blood sugars stable all while avoiding added sugars and other unhealthy ingredients.


4th of July Watermelon "Cake"
(Can be gluten free, dairy free, nut free, egg free, Vegan, Vegetarian, all-natural, no added sugar, whole foods)
Serves about 6 (use larger watermelon for more servings)

Ingredients
  • 1 Mini seedless watermelon
  • 1 14 oz can Coconut Cream or full fat coconut milk*
  • 1-2 tbs Stevia or other sweetener (optional)
  • Berries for the top (optional)

Directions (for whole cake)

The night before...
  1. Put a can of unopened coconut cream or full fat coconut milk into the back on the fridge until cold (overnight is best).
The next day...
  1. Place coconut cream or the solid part of the coconut milk into a bowl (explained in greater detail in notes below), and add sweetener if desired. 
  2. Stir cream until chunks are gone and sweetener is blended into cream.
  3. Place whipped cream back into fridge to keep it well chilled and from melting.
  4. Slice top and bottom off of the watermelon so that it can sit flat on either side. 
  5. Completely cut away the rind, and make watermelon into a pretty cylinder shape.
  6. Place watermelon onto a serving plate or stand.
  7. "Frost" the watermelon with the chilled whipped coconut cream on all sides and top.
  8. Add berries on the top if desired.
  9. Place in the fridge until ready to eat. No need to cover.
  10. Be careful when cutting to not let watermelon fall creamed side down. It's really messy!!
Directions (for easier transport or if limited room in fridge)
  1. Follow steps 1-5 above.
  2. Cut watermelon into slices and place on serving plates or a pretty serving platter.
  3. "Frost" each individual slice completely and add a few berries on the top if desired.
  4. If you have room in the fridge and it will be a while before eating, place the platter in the fridge (this way of storing should take up less room than the whole cake).
  5. If transporting put a lifted cover on top of platter and place in a cooler with ice packs to keep cool.

By this point the frosting was starting to melt. Should have kept
the cake in the fridge until time to eat. Wish I would've added
some beautiful bright blueberries on top!

Notes:
*I used a can of Trader Joe's Coconut Cream, so I was able to use the entire can without having to separate the contents. You can also use any full fat coconut milk available at most grocery stores like Walmart and Kroger. Chill unopened can in back of fridge overnight. The next day do not shake can, open can, and dig out all the solid cream which has risen to the top. Save the coconut water in bottom of can for drinking or another recipe. Continue with the recipe above at #1 under the directions. You can also use frozen whipped topping if dairy is not a problem. Do NOT freeze the coconut cream or milk.